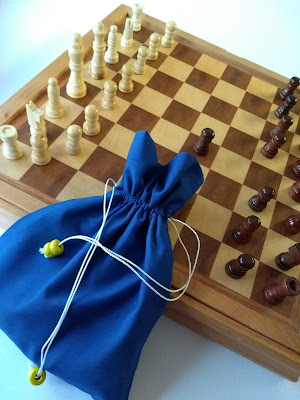
At this time of year after I've put away the Christmas decorations I like to have a good tidy up and my husband feels the urge to decorate. I often find projects that I planned ages ago but haven't completed. This happened the other day when I came across a chess set that I had put away planning to make a bag to store it in. So I dug out some oddments of cotton from my bits bag and made this draw string bag.
The dimensions of my bag are 17cm x17cm. I cut 2 pieces from the lining which were 19cm square and set these aside. Then I cut 2 rectangles from the blue fabric 19cm x 32cm to allow for the gathers and the neck of the bag. I stitched each blue piece to one patterned piece, pressed the seams open and placed these right sides together.
I stitched around the edges taking a 1cm seam allowance, leaving a gap of about 4cm along the bottom of the lining to turn the bag out to the right side. Some of you might recognise the lining material from my sleeveless shell top that I wore on holiday in Paris.
As you can just see in this picture, I closed up the hole in the lining with a short section of top stitching. I didn't re-thread my machine with white thread to close the hole because this stitching will be in the bottom of the bag and I reasoned that as it wouldn't be seen the blue cotton didn't matter and it wasn't worth the fiddle.
I pushed the lining down inside the bag taking care to push the corners into place securely. Then I pressed my bag again. As you can see I had a double layer of blue fabric at the top to form the neck of the bag. I used a white tacking stitch to mark the join between the blue fabric and the lining because I planned to stitch a double row of stitching around the bag to form a casing for the draw strings and needed to stitch this from the outside.
When I turned the bag right side out I could see the row of tacking stitches marking the line for my first row of machine stitching.
I have a sleeve arm on my sewing machine which is very useful for stitching around circular seams such as sleeves, cuffs and trouser hems and it was ideal for stitching the top of this bag. I ran two rows of straight stitches around the top of the bag just less than 1cm apart using the presser foot as my guide. Then I unpicked the side seam between these rows of stitches and threaded through two lengths of string, knotting these at each side of the bag.
Last of all I threaded two wooden beads onto the draw strings. I have seen lots of draw string bags that only have one cord around the top but I think it is definitely worth while using two draw strings. The bag will close much more securely and doesn't slip open on its own if you used two strings.


A great little tutorial and a fab idea for gift bags!
ReplyDeleteI love the zip up bags you have just made for the Secret Valentine. I would like to try one of those next I think.
DeleteGreat....
ReplyDeleteLove it
Thanks for visiting
Delete